Last updated: October 30, 2026
Portable projector setup and usage is simple when the room, the screen, and the source all fit the same plan. This guide on Portable projector setup and usage: The Complete Guide shows how to avoid a dim image, crooked keystone, weak audio, and the kind of fiddling that could have been avoided in 10 minutes.
Key Takeaways
- The right setup starts with the room, not the box. Brightness, throw distance, and wall color decide more than brand names do.
- If you want fast setup, pick a screen or wall location first, then place the portable projector to match its throw ratio.
- Auto-keystone is a convenience feature, not a cure; use it lightly and consult the manufacturer guidance, because heavy correction can reduce sharpness. Epson
- If you want a setup that fits camping use, a tiny apartment, a bedroom ceiling shot, or an outdoor movie night, the best path depends on the room and the gear you already have.
- Sound matters as much as the picture. Built-in speakers work for a small room; Bluetooth or wired audio wins for anything bigger.
- A portable projector is a poor fit for daylight-heavy rooms, mirrored walls, or anyone who wants a “set it anywhere” experience without some setup.
What actually determines the right setup?
The right setup is determined by throw distance, room light, and where the audience sits. If those three line up, the rest is mostly adjustment; if they do not, no amount of menu tweaking will save the picture.
Portable projector setup gets oversimplified because people focus on lumens or resolution first. Those matter, but they are not the first thing to solve. A 1080p unit with decent brightness can still look awful if it is pointed at a beige wall from the wrong distance and then stretched with heavy keystone correction. The image may be visible, but it will not feel clean.
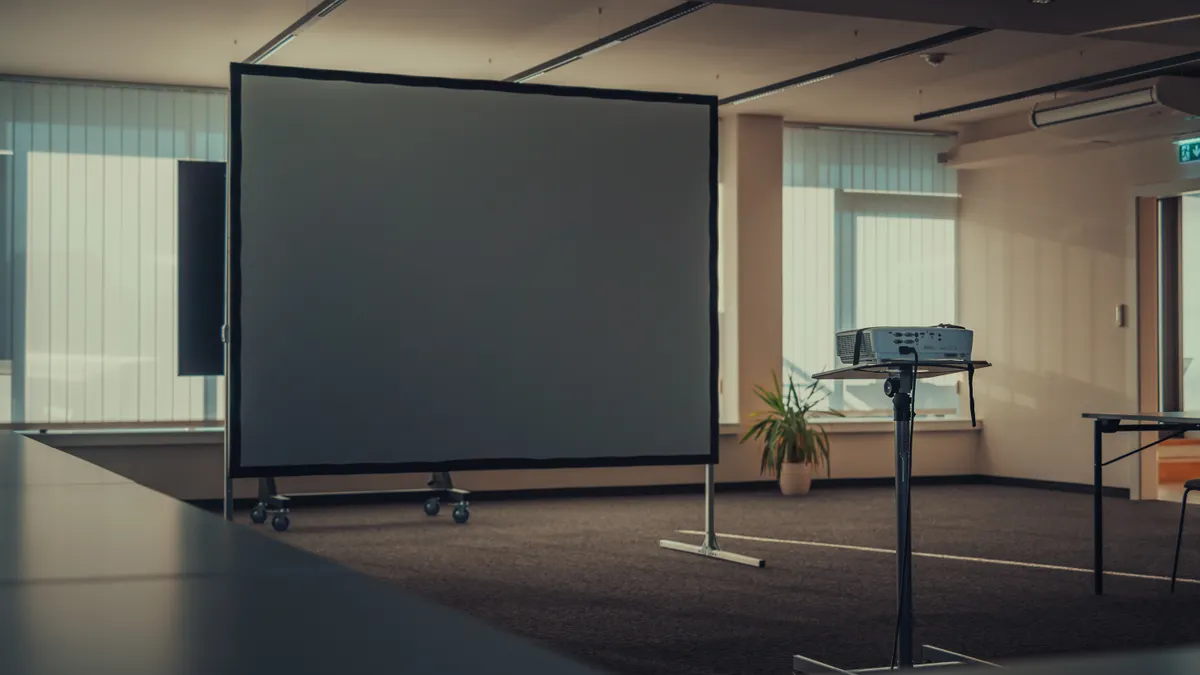
The first decision is the screen surface. A matte white screen is often a safe default, but it is not the only workable choice. A plain wall can work if it is flat and light-colored, but texture, gloss paint, and framed art around it will steal contrast. If the room has unavoidable ambient light, a gray screen can help perceived blacks, though it usually asks more of the light output. That is the trade-off: better contrast is possible, but only if the surface and placement are right.
The second decision is throw ratio. A short-throw portable model may fill a screen from a few feet away; a standard portable model may need much more. A common mistake is buying by diagonal size claims alone, then discovering the unit cannot fill the intended space from the shelf or coffee table you already own. Check the throw ratio in the spec sheet before anything else.
Brightness comes next. The industry standard for many projector specs is ANSI lumens, but marketing numbers are not always measured the same way. Use brightness as a relative guide, not a promise. For a dark bedroom, lower brightness may be fine. For a living room with lamps on, you need more output and a smaller image. For outdoor use at dusk, you need still more. (Source: ProjectorCentral)
If the room is flexible, then the easiest path is: screen first, unit second, source last. If the room is fixed, then the answer flips and the unit must be chosen around the room geometry.
| Situation | Best Path | Why Other Options Fail |
|---|---|---|
| Dark bedroom, 80- to 100-inch image | Use a matte wall or portable screen and keep the throw short | Heavy brightness is less important than correct placement and focus |
| Bright living room | Choose a brighter unit and smaller image size | A huge image looks washed out before it looks cinematic |
| Tight apartment shelf setup | Pick short throw and manual focus with light keystone use | Long-throw units need more distance than the room can give |
| Outdoor night use | Use a screen and external speaker | Wall texture, wind, and built-in audio all become weak points |
The wrong answer for many readers is “just buy the brightest one.” Brightness without placement discipline usually leads to a bigger, dimmer, less sharp picture. Quick check: if you do not know your throw distance and screen surface yet, that is the problem to solve first.
How do I set up a portable projector in 10 minutes?
You can set it up in 10 minutes if you place the screen, lock the distance, and avoid overusing digital correction. If you start by hunting through settings, the setup usually drags on twice as long.
For a typical portable setup with HDMI, USB-C, or wireless casting, the fastest reliable path is usually this:
- Pick the viewing surface first. Use a 100-inch screen if your room allows it, or scale down to 80 inches if the space is tight.
- Place the unit at the throw distance listed in the manual or product sheet. If the device is short throw, measure from lens to screen, not from the back edge.
- Set the height so the lens is roughly centered on the screen. A small tilt is acceptable; a steep angle creates distortion that digital keystone has to fix.
- Connect the source through HDMI when possible. HDMI 2.0 is common for 1080p and 4K playback; USB-C video works on some phones, tablets, and laptops, but not all.
- Turn off room lights that hit the screen directly. Even one lamp aimed at the wall can flatten contrast more than people expect.
- Use manual focus first, then apply the smallest keystone correction needed. If the image is trapezoid-shaped, move the unit before you correct it in software.
- Set audio early. Built-in speakers may be enough for one or two people in a bedroom, but an external speaker is usually better for a living room or backyard.
- Run a test pattern or a simple grid image and check corners, focus, and black levels before you start a movie.
There are two habits that save the most time. First, keep a fixed cable kit nearby: one HDMI cable, one USB-C cable if your source supports it, and a power strip with enough outlets for the unit and speaker. Second, mark the floor or table with tape once you find the sweet spot. That way, next time, the unit goes back into the same position without guesswork.
A lot of portable models also include autofocus and auto-keystone. Those features are useful, but they are not magic. Autofocus can miss when the surface is textured or the room is dim in odd ways. Auto-keystone can make text softer because the image is being digitally warped, so consult the manual or a professional installer if you are unsure. Use them as helpers, not replacements for placement. (Source: BenQ)
If you are planning to move the setup often, a carrying case, a spare remote battery, and a short extension cord matter more than a flashy spec. Those are the things that make the setup repeatable. Quick check: if your setup changes rooms every week, build for speed and repeatability, not maximum image size.
What should I do if the room is bright?
You should reduce the image size, improve the screen surface, and aim for a brighter portable projector, not try to fight daylight with settings alone. If daylight is flooding the room, the normal advice to “turn down the lights” is useless.
Ambient light is the biggest enemy of contrast. A bright room does not only make the picture look faded; it also makes blacks look gray and colors less saturated. That means the image may technically be on screen while still feeling washed out. In that situation, the smartest move is often to shrink the image from, say, 100 inches to 80 inches and regain perceived brightness. A smaller image concentrates the available light.
The screen surface matters a lot here. A matte, tensioned screen performs better than a wrinkled fabric hanging loose. If you are using a wall, avoid glossy paint and anything with visible texture. If the room has windows, blackout curtains help more than most people expect. A room-darkening curtain panel can do more for the result than another round of menu adjustments.
This is also the setting where people are tempted to push the projector too hard. If the image is still weak, do not immediately increase digital sharpening or overdo contrast settings. That can produce bright edges and ugly halos. A better path is to reduce the image size, cut stray light, and move closer to the screen if your throw ratio allows it.
For sources, prefer a direct HDMI connection over a flaky wireless cast when possible. Wireless is convenient, but it can add delay and compression. If the room is bright enough that the picture already needs help, you do not want the signal quality working against you too.
A practical bright-room path looks like this:
- Close or cover the window nearest the screen.
- Use a matte screen or the flattest wall available.
- Cut the diagonal size before touching advanced picture settings.
- Increase brightness mode if the model offers one, but keep color temperature natural.
- Use a wired source if the content allows it.
- Check whether the unit has enough light output for the room; if not, the honest answer is a brighter model, not more tweaking.
Portable models are often advertised for “home theater” use, but a bright daytime living room is a tougher target than most product pages admit. If the room is bright most of the day, then a portable projector is not the right primary display. Quick check: if you need the picture to compete with window light at noon, you either need serious blackout control or a different display choice.
How do I get the sharpest image without ruining it?
You get the sharpest image by minimizing digital correction and matching the lens height to the screen, not by cranking every picture control upward. If text looks soft, the problem is usually geometry, focus, or surface texture before it is resolution.
The biggest mistake here is relying on keystone correction as a permanent fix. Keystone is useful when the unit cannot sit perfectly centered, but it can soften edges because the image is being remapped. Manual placement is better. If the top of the picture is wider than the bottom, move the device, raise or lower it, or adjust the screen height before you lean on digital correction.
Focus matters more than many people realize. A tiny change in lens position can make subtitles look cleaner across the whole width. If the unit has a focus ring, set it after the image has been at operating temperature for a few minutes. Some compact models shift slightly as they warm up. Do not fine-tune focus the moment the machine powers on and then wonder why it seems off 15 minutes later.
The source signal matters too. A low-bitrate stream can look soft even on a good setup. If your content supports it, use a higher-quality source through HDMI. For 4K-capable models, check whether the signal path supports the resolution you expect. Not every “4K” portable projector handles native 4K input the same way, and some are resolution-shifted rather than native. That does not make them useless, but it does change expectations.
A cleaner image path is:
- Place the unit level with the screen center.
- Set the throw distance correctly before turning on advanced correction.
- Focus on a grid or subtitle-heavy scene.
- Use the smallest possible keystone adjustment.
- Reduce screen size if the room is bright and the corners look weak.
- Check that the wall or screen surface is flat and matte.
- Use a direct source feed for the sharpest signal path.
One more useful benchmark: if you can read on-screen text comfortably from your seating distance, the setup is doing its job. If text looks fuzzy before the movie starts, do not wait for the credits to decide something is wrong. Quick check: if the picture is geometrically square but still soft, focus on source quality and surface flatness before buying new gear.
Which sound setup makes the most sense?
The right sound setup is usually external audio, unless the room is tiny and the viewing group is one or two people. If you rely on built-in speakers in a larger room, the picture may look fine while dialogue still feels thin.
Portable projectors often include speakers in the 3 W to 10 W range, sometimes higher on paper, but speaker wattage alone does not tell you much about clarity or bass. Small built-in drivers can be perfectly usable for news, YouTube, or a solo bedroom session. They are much less convincing for action films, outdoor use, or a room with even moderate background noise.
There are three common paths:
-
Built-in speakers only
Good for: quick solo viewing, travel, and a very small room.
Weakness: limited volume, weak bass, narrow sound. -
Bluetooth speaker or soundbar
Good for: flexible placement, casual movie nights, and rooms without easy cable routing.
Weakness: possible audio delay, battery management, and pairing hassles. -
Wired audio through 3.5 mm, optical, or HDMI ARC/eARC when supported
Good for: the most stable sync and best day-to-day reliability.
Weakness: more cables and less freedom.
If lip sync matters, wired audio is the safest choice. Bluetooth latency varies by codec and device support. Some setups are fine, some drift just enough to be distracting. If your source, speaker, and display all support low-latency pairing, Bluetooth can work well; if not, wired is still the cleaner answer.
For outdoor use, a separate speaker is almost always worth it. Even a decent built-in speaker can be swallowed by open air. Indoors, a soundbar on the same wall as the screen often gives a better result than trying to max out the device speakers. If the room is large, place the speaker near the screen line rather than behind the audience.
Sound setup is where portability can become a trap. A lightweight device suggests easy carry, but an audio chain can quickly add extra adapters, batteries, and pairing steps. If the goal is true grab-and-go use, then choose a setup with one reliable speaker path and stick to it. Quick check: if you care about dialogue clarity more than having no cables, plan on external audio.
What portable projector setup works for travel, camping, and bedrooms?
The best setup depends on the setting: bedrooms favor convenience, camping favors durability, and travel favors fewer pieces. If you try to use one arrangement for all three, something will annoy you.
For a bedroom, the easiest setup is a small screen or plain wall, modest image size, and built-in audio unless you want late-night volume control through headphones or a compact speaker. A bedroom setup often uses a coffee table, dresser, or shelf. The key is consistency. Keep the unit, remote, charger, and source cable in one bag so setup takes minutes. A portable screen around 80 inches can be easier to fit than a larger one, especially if the room has a ceiling fan or low furniture.
For travel, weight and cable count matter more than peak image quality. A pocketable or compact model with USB-C power options can be easier to live with than a larger unit that needs a heavy adapter. The trade-off is brightness and speaker power. Travel setups should also assume you will not always control the room darkness. If you are staying in a hotel with fixed lighting, do not expect theater-level contrast.
For camping, battery life and surface choice are the real problems. A camping setup is only as good as its power source and the wind stability of the screen. Battery-powered models can help, but the runtime is often highly dependent on brightness mode and speaker use. A portable power station may be part of the kit, but that adds weight quickly. A rough patch of campsite air is not a substitute for a screen. Use a tensioned portable screen or a flat, clean surface if you have no better option.
Here is a setup path for a recurring travel or bedroom user:
- Choose one screen size and stick with it, such as 80 or 100 inches.
- Pack the unit, power adapter, remote, and one video cable in the same case.
- Mark your preferred distance on a table or shelf if the room is repeatable.
- Use a known-good source device, such as a laptop, streaming stick, or phone with verified video output.
- Keep an external speaker in the kit only if you know you need one; otherwise simplify.
- Test the setup in daylight once so you know how much light your space can really handle.
This is the place where many people buy too much gadgetry. A battery model, a tripod screen, a streaming stick, a soundbar, and a case can turn a simple portable setup into a bag full of compromises. Quick check: if your main use is one room, optimize for that room; if your main use is moving around, optimize for packing, not maximum features.
When the standard advice is wrong
The standard advice is wrong when the room, screen, or source creates a special problem that normal setup steps cannot fix. If your situation falls into one of these cases, the usual “center it, darken the room, and adjust focus” advice is not enough.
| Situation | What changes | What to do instead |
|---|---|---|
| You have a textured wall | Fine detail and focus become less predictable | Use a flat screen or a smoother painted surface |
| The ceiling is low and the screen is high | Lens angle gets awkward | Mount or place the unit lower, then reduce keystone |
| The audience sits very close | Pixel structure and fan noise matter more | Use a smaller image and place the unit farther from ears if possible |
| You need subtitles for long viewing | Soft focus becomes obvious fast | Prioritize sharp placement and wired signal quality |
| The room has reflective glass or mirrors | Contrast drops even in a dark room | Cover reflective surfaces near the screen |
| You want 4K streaming from a phone | Not every phone outputs video the same way | Confirm USB-C display output or use a proper streaming stick |
If you are using a textured wall, the normal advice flips because the wall itself becomes the weakness. A wall that looks “fine” in daylight can still destroy subtitles and fine animation detail. Use a portable screen or a smoother wall finish instead.
If the ceiling is low, trying to correct the image digitally often makes the setup worse. The lens needs a cleaner angle, not a stronger correction filter. Move the unit, lower the screen, or change the furniture layout.
If the audience is very close, fan noise and brightness uniformity become more noticeable. At that range, small errors are obvious. Shrink the image slightly and give the unit more breathing room.
If you want subtitles or spreadsheets, you need sharper geometry than a casual movie night. That means less keystone, better focus, and a stable source path. For this use case, a compact unit with mediocre setup discipline is a bad fit.
If the room includes glass, mirrors, or glossy cabinets, the standard advice to dim the lights is not enough. Those surfaces bounce light back into the room and reduce contrast. Cover or reposition them where possible.
If you want phone-only streaming, check compatibility before you buy. USB-C video output is not universal across phones, and some apps or DRM rules can limit how content appears on external displays. A streaming stick often sidesteps the problem.
This section is the blunt answer to “Why does my setup still look wrong?” The reason is usually not one thing, but a mismatch the generic advice never addressed. Quick check: if your room has an unusual surface, a low ceiling, or a close seating distance, use the special-case path instead of the default one.
The mistakes that cost the most time
The costliest mistakes are bad placement, wrong expectations about brightness, and ignoring audio until the end. If you fix those three early, most portable projector problems disappear before the movie starts.
A few errors show up over and over:
- Buying based on resolution alone and ignoring throw ratio.
- Using a wrinkled sheet instead of a real screen and expecting a crisp image.
- Leaving auto-keystone on max because it is easier than moving the unit.
- Assuming Bluetooth audio will always stay in sync.
- Expecting daytime performance from a small unit that was really meant for dark rooms.
- Forgetting that a 4K label does not guarantee the same input, processing, or perceived sharpness across models.
The best way to avoid those mistakes is to treat setup as a sequence, not a random series of menu choices. Screen first, geometry second, signal third, sound last. That order prevents the most common dead ends.
A final honest point: a portable projector is not the right answer for every room. If you need bright-room viewing every day, permanent installation, or zero-fuss operation, a television still wins on convenience and consistency. A portable unit is for flexibility, temporary spaces, and movie-night style use. That is a real advantage, but it comes with compromises you should accept before you buy.
If you do accept those compromises, the setup can be fast, repeatable, and genuinely useful. If you fight them, you will spend more time adjusting than watching. Quick check: if you want flexibility more than perfection, a portable setup makes sense; if you want a display that behaves the same every day, look elsewhere.
How do I know my setup is actually good?
Your setup is good if the image is square, text is readable, blacks are not washed out for the room conditions, and the sound stays in sync. If one of those fails, the problem is still in the chain.
A good final check takes about 5 minutes:
- Show a grid or menu screen and confirm the rectangle is actually rectangular.
- Read subtitles from the seating position and see whether the letters hold their shape.
- Look at a dark scene and judge whether shadow detail survives without turning the whole image gray.
- Play a dialogue-heavy clip and check sync against the speaker.
- Stand up and sit down once to make sure the image still looks centered from the normal viewing spot.
If all five pass, the setup is good enough for real use. If two or more fail, do not keep tuning picture settings forever. Revisit placement, screen choice, and room light.
FAQ
Can I use a portable projector on a wall instead of a screen?
Yes, if the wall is flat, light-colored, and matte. Texture, gloss paint, and wall decorations can all reduce contrast and sharpness.
Is auto-keystone enough on its own?
Not usually. It helps with small alignment issues, but it is better to place the unit correctly first and use only the smallest correction needed.
What is the easiest audio setup for a portable projector?
A wired connection is usually the most reliable, especially if lip sync matters. Bluetooth can work, but latency depends on the devices involved.
How big should the image be in a bright room?
Smaller is usually better. In bright conditions, reducing the image size often helps more than pushing picture controls harder.
If you want one simple rule to remember, use this: the best portable projector setup is the one that needs the least correction to look right. That is the difference between a useful system and a fiddly one. Quick check: if you can sit down, press play, and stop thinking about the gear, the setup is working.
Drafted with AI; not yet reviewed by a person.